How to Freeze Corn (Cobs or Kernels) This page may contain affiliate links. Learn More.
June 9, 2025 by Victoria Leave a Comment
Store your fresh corn in the freezer for up to a year with this simple process for Freezing Corn. This easy method can be used to freeze corn on the cob or whole kernels. Then you can enjoy your frozen corn in soups, pot pies, or on its own as a quick side dish!
Jump to Recipe Print Recipe
How to Freeze Corn (Cobs or Kernels!)
We love our homegrown corn around here, and no matter how much we grow, there never seems to be enough! I can most of our corn for using in our favorite vegetable soup, but there are times when I have too little for a canning batch… so I freeze it instead!
Now retrieving an image set.
This method is perfect whether you want to freeze corn on the cob or whole kernels!
Any silk or husk left on the corn will typically fall off during the boiling process!
Tips for Choosing the Best Fresh Corn
If you are growing your own corn, you will just take what you get. However, if you are choosing corn from the market, there are some things you can look for to ensure the best quality and flavor!
- Look for Bright Green Husks – The husk should be tightly wrapped around the ear and feel slightly damp. Dry, yellowing, or loose husks are a sign the corn is past its prime.
- Check the Silks – The silks (the stringy part at the top) should be light brown and a little sticky. If they’re dry or black, skip it.
- Feel for Full Kernels – Gently squeeze the ear through the husk. It should feel plump and full from top to bottom with no soft or empty spots.
- Avoid Pre-Husked Corn – Corn starts to lose its sweetness as soon as it’s husked. If possible, buy ears still in the husk and wait to peel them until you’re ready to prep and freeze.
- Use It Quickly – For the sweetest flavor, try to freeze corn within 24 hours of picking or buying (if possible!). The sugars in corn start turning to starch as soon as it’s harvested, which dulls the flavor over time.
Instructions
This process is so easy! Once you give it a try for the first time, you’ll never go back to store-bought frozen corn. You can use this method with fresh corn from your garden, your neighbor’s, the farmer’s market, or the grocery store.
- Prep – First, you’ll want to husk and clean your corn. For corn on the cob, cut the ears into the length you want. We often just cut our corn ears in half for a perfect serving size.
- Cut (Optional) – If you want to freeze whole kernels, you can cut them off of the ears before or after the blanching process. However, I find that cutting them before is a lot easier and the kernels stay intact much better than when cut off the ear after blanching. This is also a good time to clean any mold, rot, or bug spots off the ears. I don’t like to blanch imperfect corn (because anything that goes into the water will go into the kernels you eat later!). So, I cut the good kernels from the cob and blanch them loose.
- Blanch – Boil a large pot of water and place the corn cobs or kernels in the boiling water. Allow the water to come back to a rolling boil and set a timer for 4 minutes. Remove the corn and place it into a large bowl of ice water for 30-60 seconds to stop the cooking process.
- Drain – I like to place my corn cobs and kernels on towels to drain before freezing them. This reduces the chance of ice build-up.
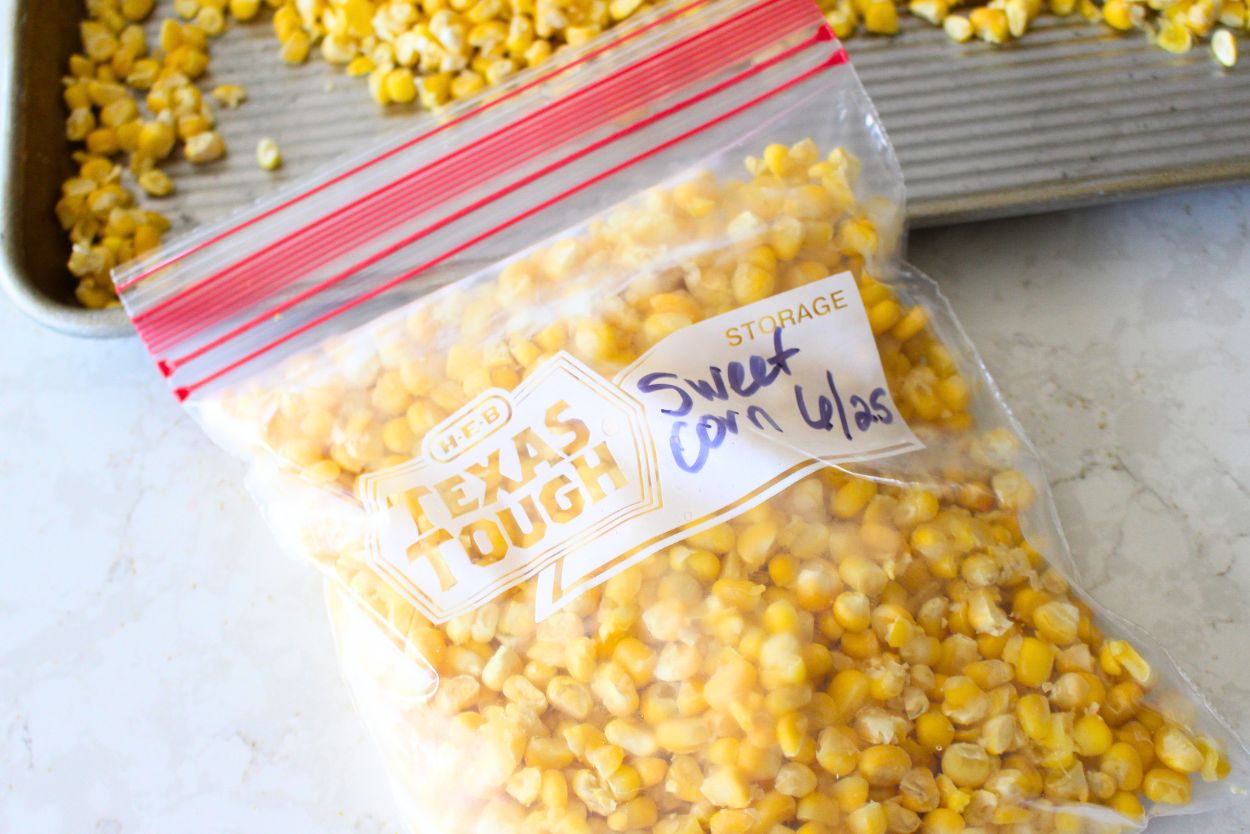
- Freeze – Place your drained corn on a single layer on a parchment lined baking tray and freeze flat.
- Package – Once your corn is completely frozen, you can break it up as needed and place in freezer-safe bags. Label with the date, and store for up to 12 months.
How to Use Frozen Corn
Frozen corn is super versatile and easy to use straight from the freezer since there is no need to thaw! Here are some of our favorite ways to use our frozen corn supply!
Now retrieving an image set.
Other Food Preservation Ideas
Whether you are growing your own food or buying it in bulk from a local farmer (or the grocery store!), understanding how to preserve it is so important. Here are a few ideas to help you get started canning for long-term food storage!
How to Freeze Corn (Cobs or Kernels)
Store your fresh corn in the freezer for up to a year with this simple process for Freezing Corn. This easy method can be used to freeze corn on the cob or whole kernels. Then you can enjoy your frozen corn in soups, pot pies, or on its own as a quick side dish! No ratings yet Print Pin Rate Course: food preservation, freezer cookingCuisine: AmericanKeyword: Freezing Corn, How to Freeze Corn Prep Time: 15 minutes minutesCook Time: 5 minutes minutesTotal Time: 20 minutes minutes
Ingredients
Instructions
- First, you’ll want to husk and clean your corn. For corn on the cob, cut the ears into the length you want. We often just cut our corn ears in half for a perfect serving size.
- (Optional) If you want to freeze whole kernels, you can cut them off of the ears before or after the blanching process. However, I find that cutting them before is a lot easier and the kernels stay intact much better than when cut off the ear after blanching. This is also a good time to clean any mold, rot, or bug spots off the ears. I don’t like to blanch imperfect corn (because anything that goes into the water will go into the kernels you eat later!). So, I cut the good kernels from the cob and blanch them loose.
- Boil a large pot of water and place the corn cobs or kernels in the boiling water. Allow the water to come back to a rolling boil and set a timer for 4 minutes. Remove the corn and place it into a large bowl of ice water for 30-60 seconds to stop the cooking process.
- (Optional) Remove your corn from the ice bath and place on a towel lined tray/plate. This reduces the chance of ice build-up.
- Place your corn on a single layer on a parchment lined baking tray and freeze flat.
- Once your corn is completely frozen, you can break it up as needed and place in freezer-safe bags. Label with the date, and store for up to 12 months.
Tried this recipe?Mention @AModHomestead or tag ##amodernhomestead!
Pin This for Later
Share with your friends!
Filed Under: All Posts, From Scratch, Homesteading Tagged With: Cooking, Food Preservation, Freezer, From scratch, Homestead Pantry, Homesteading
Source: Original Article